参考链接:
https://www.howtoforge.com/installing-lighttpd-with-php5-php-fpm-and-mysql-support-on-centos-6.4-p21、前提
服务器IP使用192.168.0.1002、安装Lighttpd
因为CentOS的官方软据仓库中不包含Lighttpd和PHP-FPM,所以我们需要启用Remi RPM 软件仓库和EPEL软件仓库:
rpm --import https://fedoraproject.org/static/0608B895.txt
wget http://dl.fedoraproject.org/pub/epel/6/x86_64/epel-release-6-8.noarch.rpm
rpm -ivh epel-release-6-8.noarch.rpm
wget http://dl.fedoraproject.org/pub/epel/6/x86_64/epel-release-6-8.noarch.rpm
rpm -ivh epel-release-6-8.noarch.rpm
rpm --import http://rpms.famillecollet.com/RPM-GPG-KEY-remi
rpm -ivh http://rpms.famillecollet.com/enterprise/remi-release-6.rpm
rpm -ivh http://rpms.famillecollet.com/enterprise/remi-release-6.rpm
yum install yum-priorities
编辑/etc/yum.repos.d/epel.repo...
vi /etc/yum.repos.d/epel.repo
添加行priority=10到[epel]部分:
[epel]
name=Extra Packages for Enterprise Linux 6 - $basearch
#baseurl=http://download.fedoraproject.org/pub/epel/6/$basearch
mirrorlist=https://mirrors.fedoraproject.org/metalink?repo=epel-6&arch=$basearch
failovermethod=priority
enabled=1
priority=10
gpgcheck=1
gpgkey=file:///etc/pki/rpm-gpg/RPM-GPG-KEY-EPEL-6
[...]
然后同样修改/etc/yum.repos.d/remi.repo文件的[remi]部分,并将enable改为1:
vi /etc/yum.repos.d/remi.repo
[remi]
name=Les RPM de remi pour Enterprise Linux $releasever - $basearch
#baseurl=http://rpms.famillecollet.com/enterprise/$releasever/remi/$basearch/
mirrorlist=http://rpms.famillecollet.com/enterprise/$releasever/remi/mirror
enabled=1
priority=10
gpgcheck=1
gpgkey=file:///etc/pki/rpm-gpg/RPM-GPG-KEY-remi
failovermethod=priority

[remi-test]
name=Les RPM de remi en test pour Enterprise Linux $releasever - $basearch
#baseurl=http://rpms.famillecollet.com/enterprise/$releasever/test/$basearch/
mirrorlist=http://rpms.famillecollet.com/enterprise/$releasever/test/mirror
enabled=0
gpgcheck=1
gpgkey=file:///etc/pki/rpm-gpg/RPM-GPG-KEY-remi
然后可以通过下面的命令安装Lighttpd:
yum install lighttpd
之后我们创建Lighttpd的系统启动链接并将其启动(之后系统启动时Lighttpd自动启动):
chkconfig --levels 235 lighttpd on
/etc/init.d/lighttpd start
/etc/init.d/lighttpd start
如果Lighttpd启动时失败,并报如下错误信息...
(network.c.203) socket failed: Address family not supported by protocol
打开/etc/lighttpd/lighttpd.conf...
vi /etc/lighttpd/lighttpd.conf
并更改server.use-ipv6,由enable改为disable:
[...]
##
## Use IPv6?
##
server.use-ipv6 = "disable"
[...]
然后尝试重启Lighttpd,现在应该可以正常工作了:
/etc/init.d/lighttpd start
现在直接在浏览器中输入地址http://192.168.0.100,你应该看到下面的页面:
在CentOS 6.4上Lighttpd的默认文档根目录/var/www/lighttpd/,配置文件是/etc/lighttpd/lighttpd.conf。
3、安装PHP5
我们可以通过PHP-FPM使得PHP5在Lighttpd上工作,我们安装下述软件包:
yum install php-fpm lighttpd-fastcgi
PHP-FPM是守护进行,运行FastCGI服务在端口9000上。
打开/etc/php-fpm.d/www.conf...
vi /etc/php-fpm.d/www.conf
并将user和group设置为lighttpd:
[...]
; Unix user/group of processes
; Note: The user is mandatory. If the group is not set, the default user's group
;       will be used.
; RPM: apache Choosed to be able to access some dir as httpd
user = lighttpd
; RPM: Keep a group allowed to write in log dir.
group = lighttpd
[...]
为PHP-FPM创建系统启动链接并将其启动:
chkconfig --levels 235 php-fpm on
/etc/init.d/php-fpm start
/etc/init.d/php-fpm start
为了在Lighttpd中启用PHP5,我们必须修改两个文件,/etc/php.ini 和/etc/lighttpd/lighttpd.conf。首先我们打开/etc/php.ini并取出cgi.fix_pathinfo=1这一行前面的注释:
vi /etc/php.ini
[...]
; cgi.fix_pathinfo provides *real* PATH_INFO/PATH_TRANSLATED support for CGI.  PHP's
; previous behaviour was to set PATH_TRANSLATED to SCRIPT_FILENAME, and to not grok
; what PATH_INFO is.  For more information on PATH_INFO, see the cgi specs.  Setting
; this to 1 will cause PHP CGI to fix its paths to conform to the spec.  A setting
; of zero causes PHP to behave as before.  Default is 1.  You should fix your scripts
; to use SCRIPT_FILENAME rather than PATH_TRANSLATED.
; http://www.php.net/manual/en/ini.core.php#ini.cgi.fix-pathinfo
cgi.fix_pathinfo=1
[...]
然后我们打开/etc/lighttpd/modules.conf并取出include "conf.d/fastcgi.conf"这一行前面的注释:
vi /etc/lighttpd/modules.conf
[...]
##
## FastCGI (mod_fastcgi)
##
include "conf.d/fastcgi.conf"
[...]
然后打开/etc/lighttpd/conf.d/fastcgi.conf:
vi /etc/lighttpd/conf.d/fastcgi.conf
在fastcgi.server这一部分,保留原来的注释并添加你自己的fastcgi.server部分,如下:
[...]
## PHP Example
## For PHP don't forget to set cgi.fix_pathinfo = 1 in the php.ini.
##
## The number of php processes you will get can be easily calculated:
##
## num-procs = max-procs * ( 1 + PHP_FCGI_CHILDREN )
##
## for the php-num-procs example it means you will get 17*5 = 85 php
## processes. you always should need this high number for your very
## busy sites. And if you have a lot of RAM. :)
##


fastcgi.server += ( ".php" =>
        ((
                "host" => "127.0.0.1",
                "port" => "9000",
                "broken-scriptfilename" => "enable"
        ))
)

#fastcgi.server = ( ".php" =>
#                   ( "php-local" =>
#                     (
#                       "socket" => socket_dir + "/php-fastcgi-1.socket",
#                       "bin-path" => server_root + "/cgi-bin/php5",
#                       "max-procs" => 1,
#                       "broken-scriptfilename" => "enable",
#                     )
#                   ),
[...]
然后我们重启Lighttpd:
/etc/init.d/lighttpd restart
4、测试PHP5 / 获取PHP5的安装细节
默认网站文档根目录是/var/www/lighttpd/。现在我们在这个目录创建一个小PHP文件(info.php)并在浏览器中调用。这个文件会显示大量有关PHP安装的有用细节,例如所安装的PHP版本。
vi /var/www/lighttpd/info.php
<?php
phpinfo();
?>
现在我们在浏览器中调用文件(例如http://192.168.0.100/info.php):
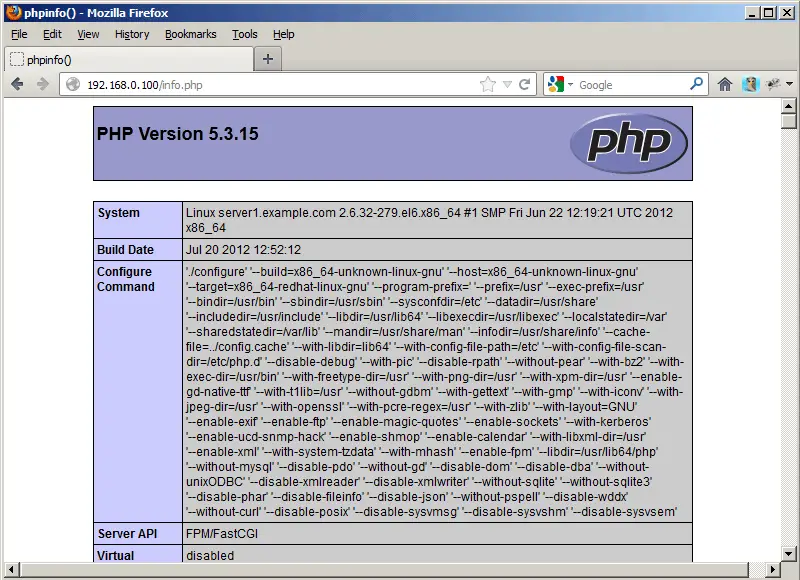
正如你所看到的,PHP5正在工作,并通过FPM/FastCGI工作,正如在Server API那一行所显示的。如果你继续向下滚动,你会看到在PHP5中已经启用的模块。
5、安装SQLite3
默认情况下,通过yum安装的PHP应该包含SQLite3,可以通过下面命令进一步确认:yum install sqlite
6、让PHP-FPM 使用Unix Socket
默认情况下PHP-FPM监听127.0.0.1上的9000端口。也可以让PHP-FPM使用Unix socket,这样可以避免TCP开销。要这样做,打开/etc/php-fpm.d/www.conf...
vi /etc/php-fpm.d/www.conf
并将下面几行做如下更改:
[...]
;listen = 127.0.0.1:9000
listen = /tmp/php5-fpm.sock
[...]
listen.owner = lighttpd
listen.group = lighttpd
listen.mode = 0660
[...]
然后重新加载:
/etc/init.d/php-fpm reload
下一步打开Lighttpd的PHP配置文件/etc/lighttpd/conf.d/fastcgi.conf并将域名和端口相应的行替换为"socket" => "/tmp/php5-fpm.sock":
vi /etc/lighttpd/conf.d/fastcgi.conf
fastcgi.server += ( ".php" =>
        ((
                "socket" => "/tmp/php5-fpm.sock",
                "broken-scriptfilename" => "enable"
        ))
)
最后重启Lighttpd:
/etc/init.d/lighttpd restart
7、下载并安装zblog
cd /var/www/lighttpd
wget https://github.com/zblogcn/zblogphp/releases/download/1626/Z-BlogPHP_1_5_0_1626_Zero.zip
yum install unzip
unzip Z-BlogPHP_1_5_0_1626_Zero.zip
chown lighttpd:lighttpd /var/www/lighttpd/* -R
rm index.html
yum install unzip
unzip Z-BlogPHP_1_5_0_1626_Zero.zip
chown lighttpd:lighttpd /var/www/lighttpd/* -R
rm index.html

没有评论:
发表评论